What Happens When You Add Epoxy Resin to Concrete Countertops?
Over 60% of homeowners with bare surfaces in kitchens report visible wear within two years. Why? Untreated materials absorb spills, stain easily, and chip under daily stress. But there’s a way to transform vulnerable surfaces into resilient workspaces that last decades.
A specialized coating bonds permanently to porous surfaces, creating a shield against moisture , scratches, and impacts. This solution works like armor for high-traffic areas, preventing cracks from forming while maintaining a smooth finish. It’s particularly effective in humid climates where moisture damage accelerates deterioration.
UltraClear Table Top Epoxy applies evenly at 1/8-inch thickness, curing without strong fumes or harmful emissions. The result? A glass-like barrier that repels liquids and resists chemical cleaners. Your workspace stays pristine even after years of meal prep, heavy pans, and accidental drops.
Key Takeaways
- Creates a waterproof shield against spills and humidity
- Strengthens surfaces to withstand impacts from kitchen tools
- Prevents staining from oils, acids, and common cleaners
- Maintains smooth appearance despite daily use
- Extends lifespan of existing installations without replacement
- Ideal for moisture-prone environments like coastal homes
Exploring the Benefits of epoxy resin on concrete countertops
Transform your kitchen workspace into a durable, stylish hub that handles daily demands effortlessly. Modern protective solutions upgrade vulnerable areas with defenses against wear while unlocking creative design potential. Let’s examine how advanced formulas balance toughness and visual appeal.
Built to Withstand Heavy Use
High-performance coatings create surfaces that shrug off scratches from knives and scuffs from appliances. Premium formulas endure direct contact with 500°F cookware without warping or yellowing. This thermal resilience means no more trivets cluttering your workspace during meal prep.
Chemical-resistant barriers repel stains from oils, wine, and cleaning agents. Food-safe certifications ensure safe contact with ingredients, making these coatings ideal for baking stations. The hardened finish also resists dents from dropped utensils, maintaining smoothness for years.
| Feature | Standard Formula | Premium Formula |
|---|---|---|
| Heat Tolerance | 350°F | 500°F |
| Food Safety | FDA-compliant | FDA-certified |
| Cure Time | 24 hours | 18 hours |
| UV Stability | Moderate | High |
Design Flexibility Meets Practical Beauty
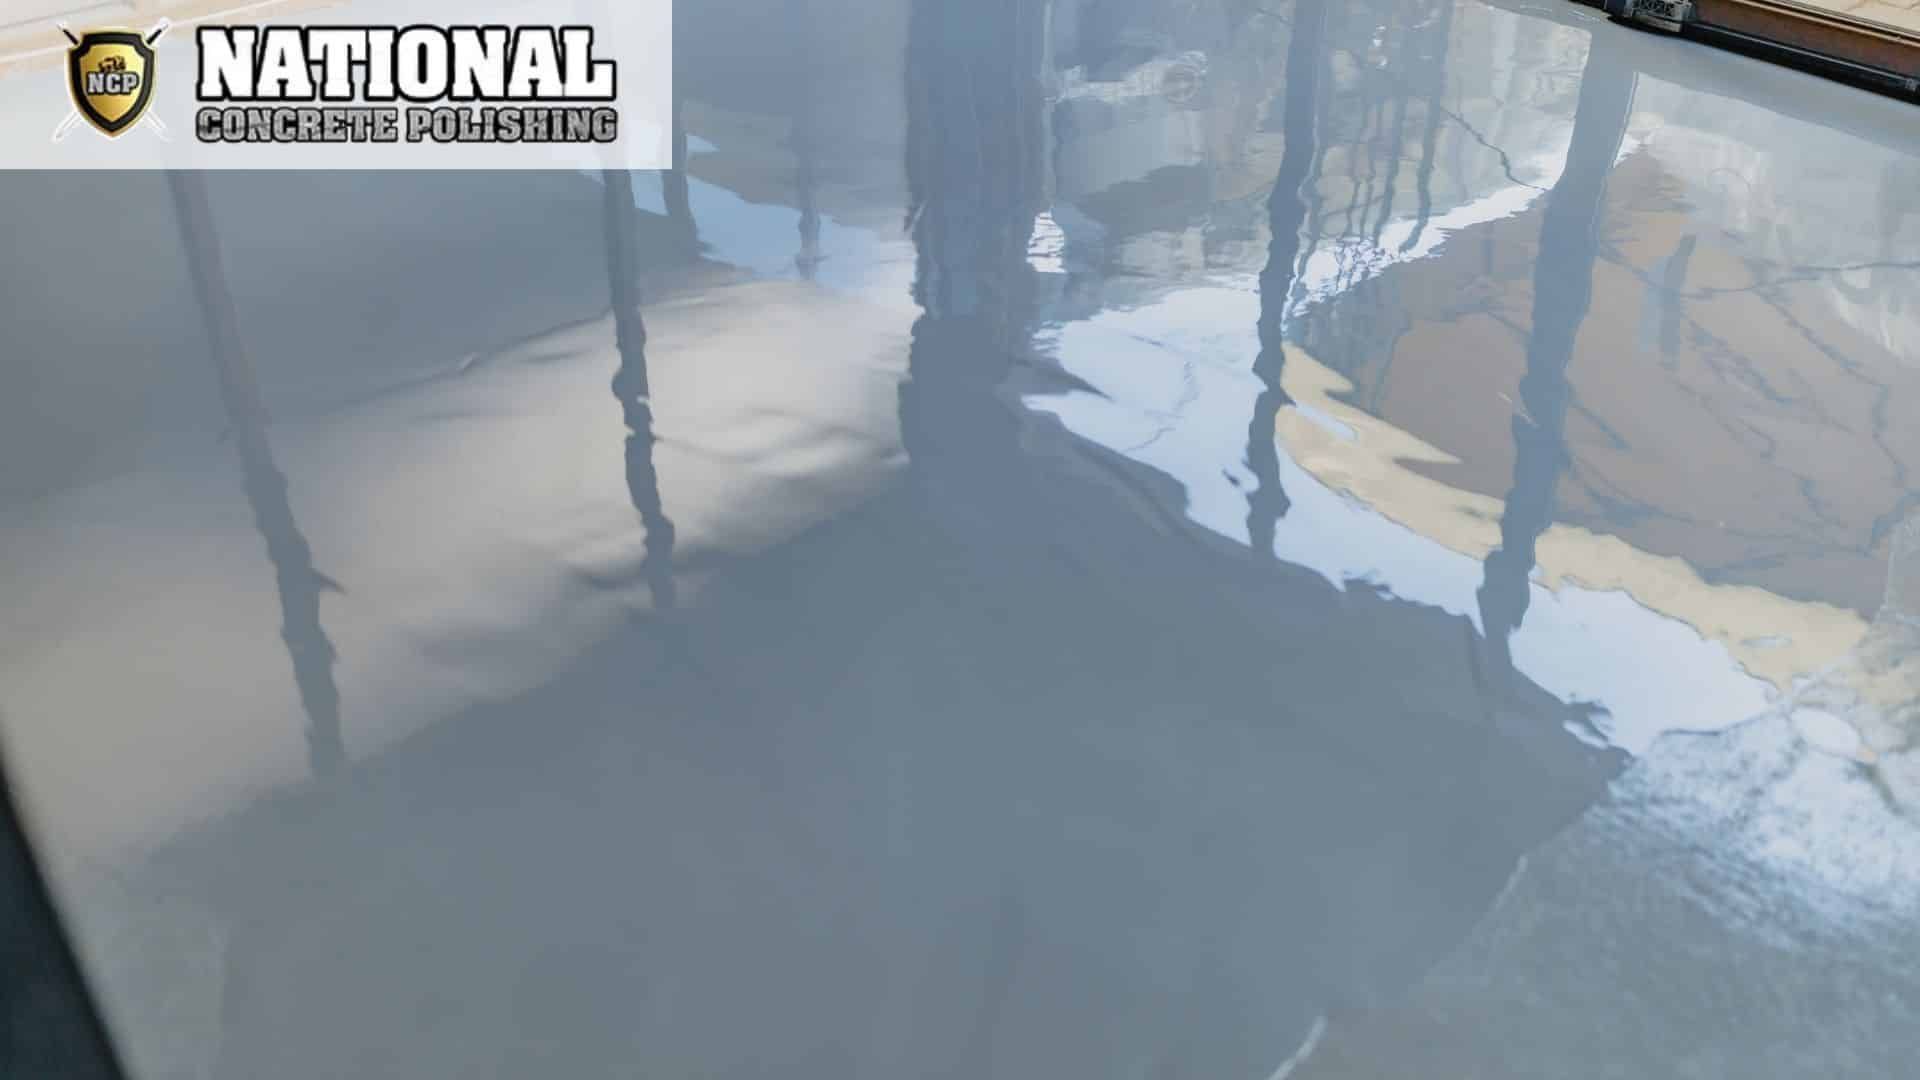
Turn functional spaces into showpieces with customizable finishes. Metallic pigments create depth, while semi-transparent layers reveal natural textures beneath. The self-leveling formula produces glass-like smoothness, enhancing light reflection for brighter kitchens.
Maintenance becomes simple – spills wipe clean without soaking in. Unlike porous materials, this coating prevents bacterial growth in seams or cracks. Choose matte or glossy finishes to match your style while enjoying spill-proof performance.
A Step-by-Step Guide to the Application Process
The secret to flawless surfaces lies in meticulous preparation and precise application. Whether tackling small projects or full-scale renovations, following proven methods ensures lasting results. Let’s break down the essentials for achieving showroom-quality finishes at home.
Preparation, Priming, and Safety Considerations
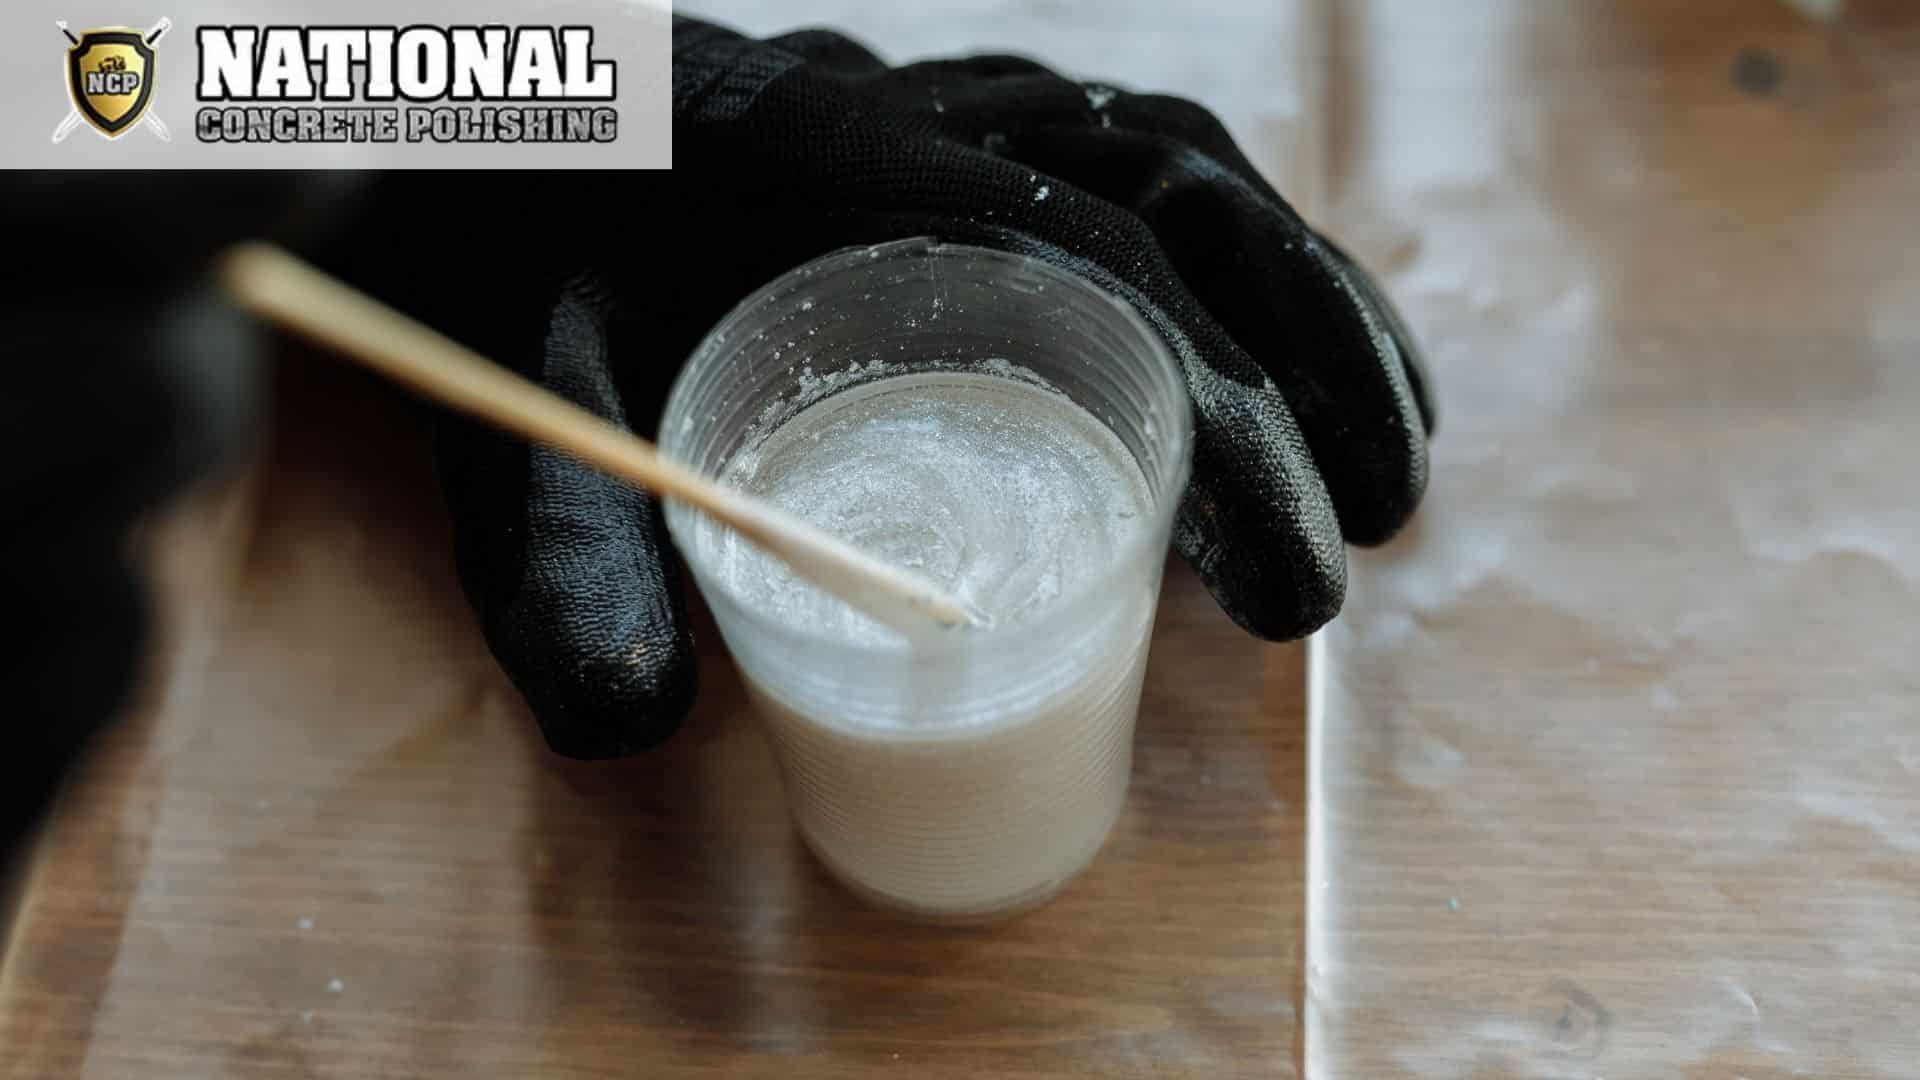
Start by inspecting your workspace for cracks or uneven areas. Use a diamond grinder to smooth rough patches and fill gaps with hydraulic cement. Remove all dust with a vacuum and wipe surfaces with denatured alcohol for optimal bonding.
Wear nitrile gloves and safety goggles during the priming stage. Apply two thin coats of bonding agent using a microfiber roller, waiting 90 minutes between layers. Keep room temperatures between 65-80°F to prevent premature curing.
| Stage | Critical Factor | Time Investment |
|---|---|---|
| Surface Prep | Moisture content below 4% | 2-4 hours |
| Priming | Even coverage | 3 hours (with drying) |
| Mixing | 2:1 ratio accuracy | 8 minutes |
| Application | 1/8-inch thickness | 45 minutes |
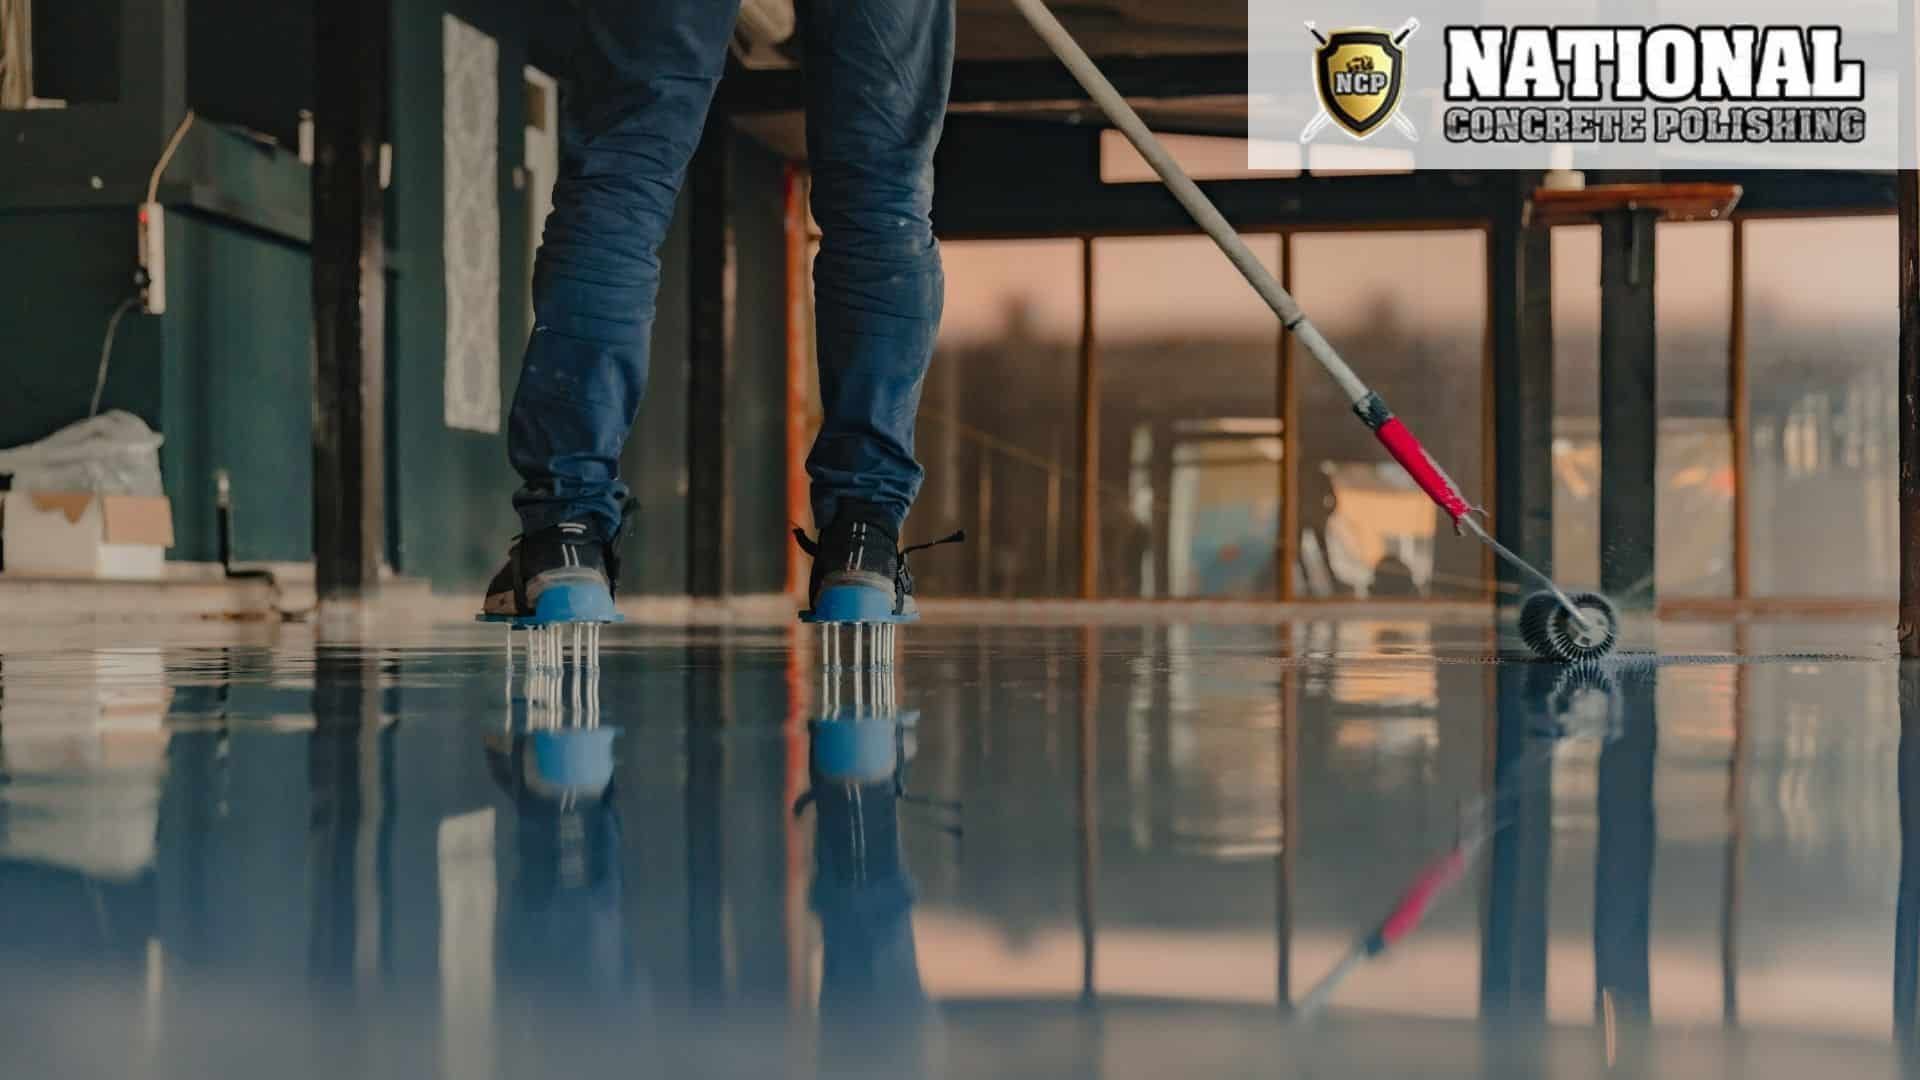
Coating Techniques and Finishing Touches
Mix components slowly to avoid air bubbles – stir for 3 minutes until fully blended. Pour the solution in zigzag patterns, then spread with a notched trowel. The self-leveling formula will smooth minor imperfections automatically.
Wait 18-24 hours before applying additional layers. Lightly sand between coats using 220-grit paper for enhanced adhesion. Final curing takes 72 hours – resist the urge to place heavy objects during this phase.
Quality, Product Selection, and Expert Tips
Choosing the right protective solution requires balancing technical specifications with real-world performance. Nearly 40% of DIY projects fail due to incompatible materials or inadequate coverage – avoid this pitfall by understanding what separates premium solutions from basic options.
Evaluating High-Performance Products
Look for kits containing industrial-grade components that cure without releasing odors. Superior formulations maintain clarity under UV exposure while resisting common kitchen abrasions. Key differentiators include:
| Feature | Standard Kit | Professional Kit |
|---|---|---|
| Coverage Area | 25 sq ft | 50 sq ft |
| VOC Content | 0% | |
| Technical Support | Email Only | Live Specialist |
| Warranty | 1 Year | Lifetime |
Premium options often include application tools and detailed video tutorials. Verify third-party certifications for food safety and slip resistance before purchasing.
Partnering With Knowledgeable Suppliers
Established businesses like National Concrete Polishing emphasize proper material selection for Florida’s humid environment. Their specialists recommend kits with moisture-blocking primers and rapid-cure formulas.
Prioritize suppliers offering project calculators and mix ratio guides. Reliable customer support teams help troubleshoot application challenges, ensuring your finished surface meets commercial durability standards. Always request batch testing reports to confirm product consistency.
Conclusion
Investing in a durable finish transforms everyday spaces into lasting assets. A high-quality protective layer boosts your surfaces’ resistance to heat, stains, and moisture while offering endless design possibilities. Custom color schemes and stone-like textures let you craft unique aesthetics without compromising functionality.
Proper application techniques ensure your project stands up to daily demands. Selecting premium kits with UV-stable formulas and food-safe certifications guarantees lasting performance. Always follow manufacturer instructions for mixing ratios and curing times to achieve glass-smooth results.
South Florida residents can access expert guidance through National Concrete Polishing. Their team helps navigate product selection, surface prep, and finishing methods tailored to humid climates. For personalized support or professional installation services, call +1 877-661-7562 .
Take the next step toward surfaces that balance beauty with rugged durability. Whether tackling DIY projects or seeking professional results, the right materials and expertise make all the difference.
FAQ
How does adding a protective layer improve durability for surfaces like countertops?
A high-quality coating creates a barrier against stains, heat, and scratches. Brands like National Concrete Polishing offer products designed to withstand daily wear while maintaining a polished look. Proper application ensures long-term performance without cracking or peeling.
Is the finish food-safe once fully cured?
Yes, once cured, non-porous surfaces sealed with NSF-certified materials are safe for food prep. Always check product labels for compliance and allow adequate curing time before use.
How long does the application process take from start to finish?
Timing varies based on project size and steps like priming or layering. Most projects require 24–72 hours for full curing. Proper prep work ensures adhesion and reduces delays.
Can existing surfaces be updated with this method?
Absolutely. Thoroughly clean and sand the area first, then apply a bonding primer. Ensure compatibility between old materials and new coatings to avoid adhesion issues.
Which brands are trusted for professional-grade results?
National Concrete Polishing and Stone Coat Countertops provide reliable kits with UV-stable formulas. Look for warranties, low-VOC options, and customer support for best outcomes.
What maintenance is required after installation?
Use mild soap and water for cleaning. Avoid abrasive pads or harsh chemicals. Reapply a top coat every few years to maintain shine and protection.
Can colors or textures be customized during application?
Yes. Pigments, metallic additives, or textured finishes can be mixed into the base layer. Many kits include design tools to achieve marble, granite, or unique artistic effects.
Will the finish yellow or degrade in sunlight?
Standard coatings may yellow outdoors. Opt for UV-resistant formulas like those from Stone Coat Countertops for outdoor or sunlit areas to preserve clarity.
How do you fix bubbles or uneven areas after pouring?
Lightly sand imperfections once the material is semi-cured, then apply a fresh layer. Work in thin coats and use a heat gun to pop bubbles during application.
You might also like